
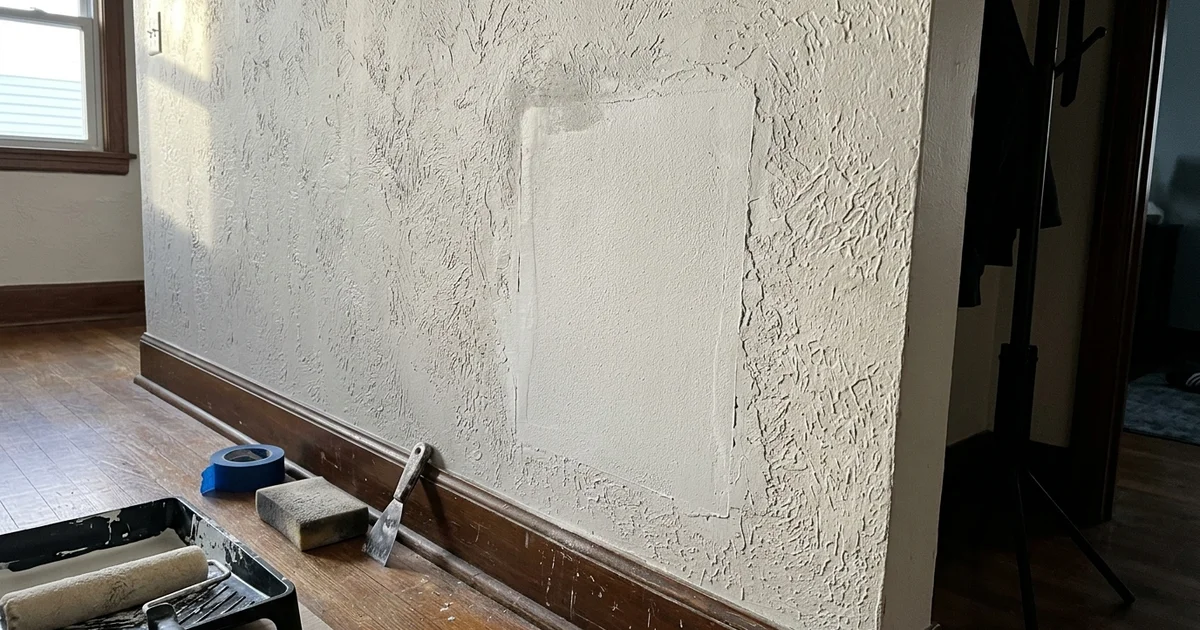
From our experience in the field, a perfectly flat drywall patch is only half the battle. Texture is what actually makes a repair disappear.
When our team handles drywall repair in Austin, identifying and matching the surface pattern is always the most critical step. Skipping this detail leaves a glaring, mismatched spot on your wall.
Let’s look at the different finishes and walk through the exact process for blending them correctly.
Why Texture Matters
Texture matters because it scatters light and hides the minor surface imperfections inherent in standard wall installations. A bare patch of flat USG joint compound sits differently on the wall than the surrounding stipple. We notice this contrast immediately under natural lighting.
“A repair isn’t finished until the wall looks like it was never damaged in the first place.”
The human eye picks up on slight differences in shadows. This is especially true when light hits a wall from a sharp angle. Our crews understand that without a matching surface pattern, the repaired area will reflect light unevenly and look like a permanent blemish.
The Three Common Textures
Most properties in the US feature one of three standard finishes: orange peel, knockdown, or smooth. Identifying your specific style dictates the tools and techniques needed for the fix.
Orange Peel
Orange peel features fine, rounded bumps that look exactly like the skin of an orange. It is sprayed on using compressed air and left alone to dry without any smoothing. We typically match this using a specialized hopper gun with specific settings:
- Air pressure between 40 and 45 PSI
- Compound thinned to a pancake batter consistency
- High-pressure nozzle for fine droplets
You’ll commonly find this finish on walls in homes from the 1980s onward.
Knockdown
Knockdown consists of larger splatters of joint compound sprayed on and then lightly flattened before they completely dry. The result is a flat-topped, splotchy pattern with smooth valleys between the bumps. Our preferred tool for this step is a 24-inch Lexan knockdown knife.
The flexible plastic blade glides over the mud without gouging the wet surface. This style is very common in Texas properties, appearing frequently on both walls and ceilings.
Smooth
Smooth walls have no added texture at all. These flat surfaces require the most careful finishing because absolutely every imperfection shows under bright light. We follow the Gypsum Association GA-214 standards for these high-end applications.
Achieving a true Level 5 smooth finish requires applying a thin skim coat of compound over the entire wall. This full-surface coating covers:
- Raw drywall paper
- Taped seams
- Fastener heads
You’ll often find this pristine look in higher-end homes and newer custom builds.
How to Identify Your Texture
You can identify your texture by shining a flashlight parallel to the wall to reveal the depth and shape of the surface bumps. This technique is called using “raking light.” We use this method because it creates harsh shadows that make the specific pattern obvious.
Holding your phone light flush against the wall will instantly show you what you’re working with.
| You see | You probably have |
|---|---|
| Small, even bumps | Orange peel |
| Flattened, irregular splotches | Knockdown |
| Little or no texture | Smooth |
| Swirls or arcs | Hand-troweled or specialty texture |
How Matching Is Done
Matching texture is a deliberate process that requires blending new compound into the old pattern using specialized tools. It takes part skill and part systematic testing to get it right.
Here is the usual process we follow for a professional result:
- Finish the repair flat. Tape, mud, and sand the patch completely smooth first.
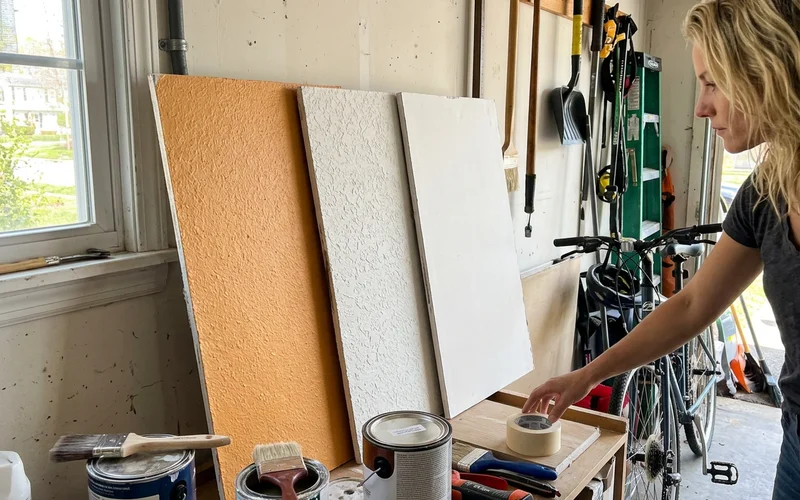
- Test on scrap. We spray a spare piece of drywall to dial in the thickness, air pressure, and spacing.
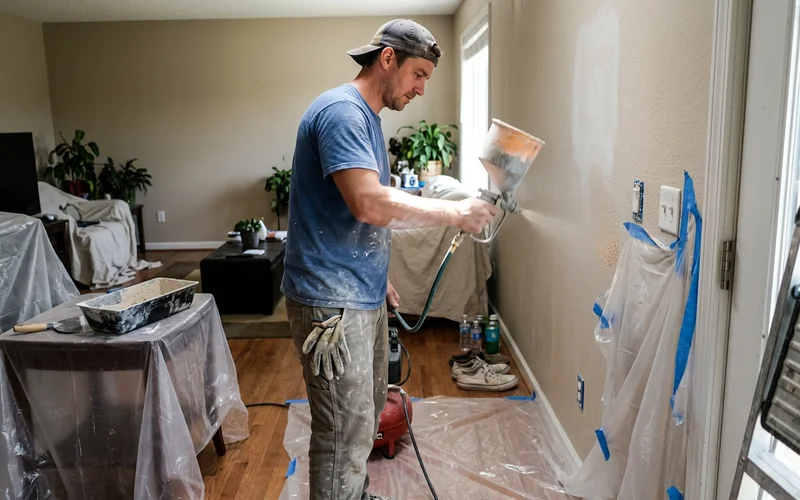
- Apply to the patch. Orange peel and knockdown are sprayed using a professional Marshalltown hopper gun. Knockdown is then flattened with a wide blade at the exact right moment.
- Feather the edges. The new spray is blended 12 to 18 inches past the repair area so there is no hard visual line.
- Let it dry fully. The mud needs a full 24 hours to cure completely before moving to primer.
Why Primer and Paint Come Next
Primer and paint come next because raw joint compound is highly porous and will absorb topcoats differently than the rest of the wall. If you paint straight over the fresh mud, it pulls the paint resins deep into the surface. We call this problem “flashing.”
Flashing leaves the repaired spot looking dull or slightly different in sheen than the surrounding area.
A dedicated coat of PVA (polyvinyl acetate) drywall primer is required to seal the material. The PVA primer locks down the porous compound and evens out the absorption rate. Our crews paint the entire wall from corner to corner instead of just rolling over the patch to ensure the absolute best blend.
When Re-Texturing a Full Wall Is Better
Re-texturing a full wall is better when the damage is extensive or the original pattern is too difficult to match cleanly. Sometimes trying to blend a small area simply isn’t the most cost-effective option. We generally recommend treating the whole surface if more than 30 percent of the wall has been patched.
There are several scenarios where a full skim coat makes more sense:
- Many repairs on one wall. Re-texturing the whole surface guarantees a consistent, unified look.
- The original texture is unusual. Some older walls were applied unevenly by hand and are nearly impossible to duplicate.
- Large replaced sections. Patching around massive new boards is physically harder to blend invisibly.
- You want to change the style. Moving from a heavy, dated pattern to a lighter orange peel requires a fresh start.
For bigger damage, our guide to patch vs replace explains when hanging a completely new section of drywall makes the most sense.
Ceilings Are Harder
Ceilings are harder to match because raking light from windows and tall fixtures constantly highlights any surface differences. Working overhead also introduces gravity into the equation. We find that wet compound tends to sag or pull differently when applied upside down.
Ceiling repairs demand significantly more care and physical effort than standard walls. You’re fighting against gravity while trying to hold a heavy hopper gun steady.
Expect the process to take more time due to several factors:
- Slower application to prevent dripping
- Careful blending around existing light fixtures
- Up to 48 hours of drying time in humid conditions
Can You Change Your Texture?
Yes, you can change your texture by applying a full skim coat over the existing pattern to create a blank slate. Many homeowners use a repair project as an opportunity to update a room’s entire aesthetic. We often update older homes to meet modern design preferences.
Your primary options for updating include:
- Knockdown to orange peel. This provides a lighter, more subtle look.
- Textured to smooth. This process requires skim coating the whole wall to achieve a Gypsum Association Level 5 finish.
- Re-texturing a full room. Covering older patches makes the space feel brand new again.
Changing a wall pattern adds time and labor costs to your project. The investment can significantly modernize a dated room and increase your property value.
Why DIY Texture Is Tricky
DIY texture is tricky because aerosol cans lack the consistent air pressure needed to replicate professional splatter patterns. Spray cans from brands like Homax are sold at hardware stores for quick fixes, and they can work for very tiny dings. The main challenges include:
- Inconsistent droplet sizing
- Sputtering as the can empties
- Difficulty controlling the spray pattern
We frequently see homeowners struggle because the pressure inside an aerosol can drops as it empties. This causes the compound to spit unevenly.
If the spray goes on too heavy or too light, the patch will stand out immediately. Practicing on a scrap board first is highly recommended. For anything larger than a doorknob hole, a professional with an air compressor gets a much more accurate match.
The Bottom Line
The bottom line is that orange peel vs knockdown texture can be matched perfectly with the right tools, testing, and technique. You don’t have to live with an obvious, ugly patch on your wall.
It takes deliberate patience, followed by the proper application of PVA primer and quality paint. Our crew handles the entire drywall and painting process in one continuous job.
Call our team today to schedule your repair, and you will never have to wait around for a second contractor to finish the work.