
Patch or Replace?
Most property owners assume any visible wall damage requires a full panel replacement.
The truth is often much simpler.
We evaluate these exact factors every day when quoting Austin drywall repair. The decision between a drywall patch vs replace usually comes down to structural integrity.
Let’s look at the size thresholds, the water damage rules, and the actual costs involved.
Size Thresholds
When comparing a drywall patch vs replace, the size of the hole is the fastest way to determine your repair method.
We usually switch from patching to panel replacement when damage exceeds six inches. Standard US wall studs sit 16 inches apart. If a hole spans most of that gap, a patch simply will not have enough support to hold up over time.
As a rough guide, reference this breakdown of common issues:
| Damage | Usual fix |
|---|---|
| Nail holes, small dings | Fill and sand |
| Nail pops | Reset with screws, fill, feather |
| Hairline cracks | Tape, mud, feather |
| Holes up to about fist size | Patch with backing or a patch kit |
| Holes larger than your hand | Cut out and replace a section |
| Long cracks with loose or crumbling board | Replace section |
| Soft, sagging or moldy drywall | Replace section after fixing the cause |
How Patching Works
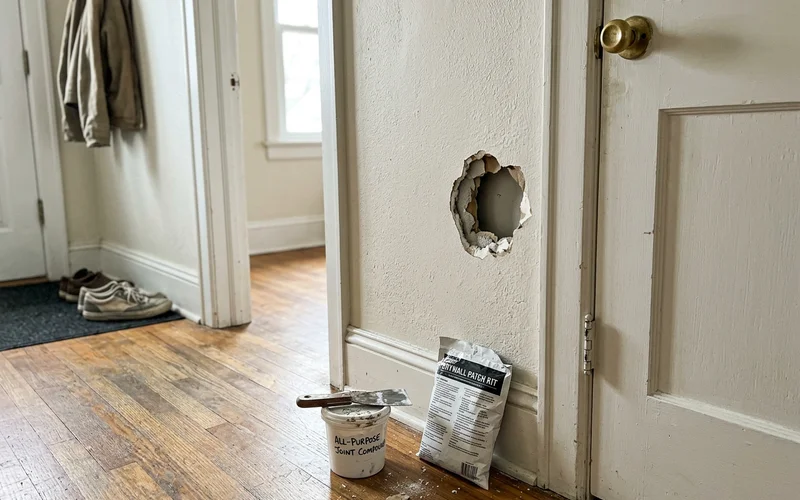
Patching is the go-to solution for localized damage where the surrounding gypsum remains structurally sound.
We rely on this method to fix doorknob holes and minor impact dents quickly. Fast-setting joint compounds like USG Easy Sand 5 allow professionals to apply multiple coats in a single day. This product chemically sets hard in just five minutes.
Our team follows a strict process to ensure these small repairs stay invisible:
- Trim loose paper and crumbled gypsum.
- Add backing behind larger holes so the patch has support.
- Cover the gap with a self-adhesive fiberglass mesh tape like FibaTape.
- Apply joint compound in thin coats, feathering wide to blend the edges.
- Sand the dried mud, match the texture, prime, and paint.
Patches are highly cost-effective and durable when executed properly.
How Section Replacement Works
Section replacement is required when damage compromises the strength of the wall.
We remove the broken material entirely and attach a brand new piece of half-inch drywall directly to the wall studs. This method restores the original fire resistance and structural integrity of the room. The typical US home has wall studs spaced 16 inches apart.
Our technicians approach a large drywall hole repair by cutting the damaged area back to these framing members to give the new panel a solid anchoring point.
- Cut the damaged area back to a clean rectangle, ideally to the nearest studs.
- Add wooden backing blocks where the seams do not meet a stud.
- Screw in a new piece of drywall cut to fit the opening.
- Tape all seams with paper tape for maximum crack resistance.
- Mud, feather, sand, texture, prime, and paint.
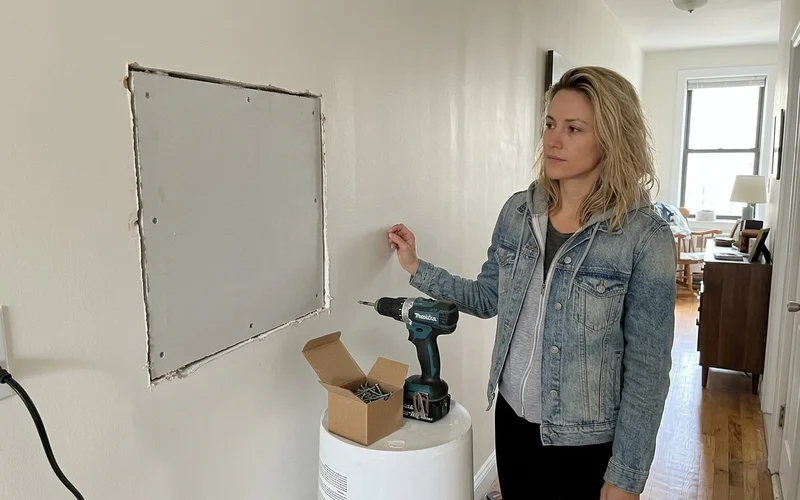
Replacing the section takes longer than a standard patch because of the extended drying time between coats.
We always use this full-panel method because it is the only reliable fix for large or weakened areas. A proper replacement guarantees the wall remains strong for years to come.
Water Damage Is Different
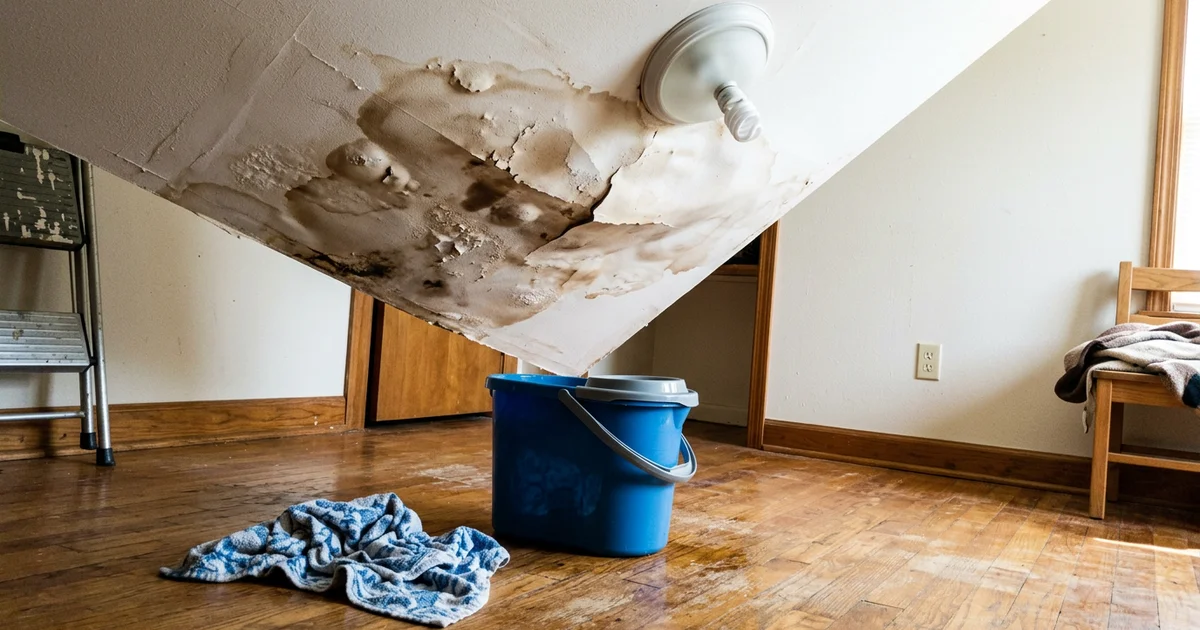
Water damage instantly changes the repair calculation from a simple patch to a potential mold remediation issue.
We refuse to patch over wet gypsum because the material loses its strength and becomes a breeding ground for mold. The Environmental Protection Agency states that moldy areas larger than 10 square feet require professional remediation.
Before any repair begins, you must evaluate the moisture spread:
- The leak must be fixed. Roof, plumbing, AC drain line, or window. Otherwise, the new drywall fails too.
- Check how far the damage goes. Moisture spreads behind the paint, so stains often look smaller than the actual soft area.
- Look for mold. Moldy drywall must be completely removed, never just painted over.
Our standard protocol for a firm wall with a simple water stain is to apply a stain-blocking PVA primer followed by paint. For soft, bulging, or crumbling materials, a complete water damaged drywall replace is your only safe option.
Cost and Time Trade-Offs
Understanding the cost difference between these drywall repair options helps you budget for your home maintenance.
Recent 2026 data from HomeAdvisor shows the average US drywall repair costs around $613.
We see typical patch jobs fall on the lower end of that spectrum. Full section replacements cost more due to increased material needs and longer labor hours.
| Feature | Patch | Section replacement |
|---|---|---|
| Typical cost | Lower | Higher |
| Time on site | Shorter | Longer |
| Drying time | Less | More, with more seams to finish |
| Best for | Small, sound areas | Large, weak, or wet areas |
| Durability | Good when done right | Best for big damage |
Blending Texture and Paint
The true mark of a successful drywall repair is an invisible transition between the old wall and the new mud.
We spend a significant portion of the job blending textures so the repaired spot vanishes completely. A patch that feels smooth will stand out glaringly on a wall with a heavy knockdown texture. Achieving that flawless finish requires three critical steps:
- Matching the texture accurately, whether your US home features orange peel, knockdown, or a smooth finish.
- Priming the new joint compound with a high-quality PVA primer so the topcoat paint does not flash or look dull.
- Painting the full wall, corner to corner, rather than just touching up the patch itself.
Our painters always recommend this corner-to-corner approach to ensure a consistent sheen across the entire surface. Spot painting almost always leaves a visible halo around the repair zone.
Cracks That Keep Coming Back
Recurring cracks usually indicate an underlying structural issue rather than a simple drywall failure.
Our guide on why drywall cracks explains how shifting foundations and settling framing stress the walls. Many areas across the US have expansive clay soils that swell with rain and shrink during a drought. This constant movement tears standard joint tape right down the middle.
Common signs of structural movement include:
- Cracks that grow wider than a quarter inch.
- Doors or windows that suddenly begin sticking.
- Diagonal cracks radiating from door frames.
We advise property owners to address the movement source before attempting another cosmetic fix. You will save time and money by getting a structural opinion first.
Ceiling Repairs
Ceiling repairs carry a higher level of risk because gravity constantly pulls on the damaged material.
We always recommend replacing soft ceiling drywall instead of patching it. Water weighs over eight pounds per gallon, and a saturated ceiling board can easily collapse.
Common causes of ceiling damage include:
- Roof leaks during heavy rainstorms.
- Overflowing AC drain lines in the attic.
- Plumbing failures from upstairs bathrooms.
Our repair process starts only after the leak is completely fixed and the surrounding wood is dry. At that point, the crew cuts out the damage and installs rigid 5/8-inch drywall.
We finish the job by taping the seams, matching the overhead texture, and painting the full ceiling plane for an even look. This thicker board resists sagging far better than standard half-inch wall panels.
How Long Repairs Take
The timeline for your project depends entirely on the drying process.
We can complete minor fixes in a few hours, but larger jobs require multiple trips. Standard pre-mixed joint compound needs roughly 24 hours to cure completely between coats. High humidity levels can push that drying time even further.
| Repair type | Typical time |
|---|---|
| Nail holes and dings | Same day with paint |
| Small patches | 1 to 2 visits |
| Section replacement | 2 to 3 days with drying time |
| Ceiling water damage | 2 to 4 days after the area dries |
Most of that time is simply waiting for the wet materials to harden.
Our crews use fans and dehumidifiers to speed up the process whenever possible.
Can I Patch It Myself?
You can absolutely tackle small wall repairs on your own.
We encourage property owners to fix basic nail holes and minor dings using lightweight spackle and a simple putty knife. Larger repairs demand specialized tools and a lot more patience.
The hardest parts of a DIY repair include:
- Feathering compound with a 10-inch or 12-inch drywall knife to hide humps.
- Matching existing wall textures accurately.
- Priming properly so the final paint coat does not flash.
We find that a professional gets a much better result on anything bigger than a small hole or any overhead ceiling repair. Hiring a pro saves you multiple trips to the hardware store and guarantees a perfectly smooth finish.
Get a Clear Answer
Taking the guesswork out of property maintenance is exactly what our team does best.
We will look at your wall damage, check for hidden moisture, and tell you whether you need a drywall patch vs replace. You get the repair, texture matching, and final paint coat bundled into one fixed price.
Our team is ready to help whenever you need us. Book a free repair estimate today.
We will be at your door within 48 hours to get your property back to perfect shape.